Search orthologs
Note
Data availability for this tutorial: the data set of 10 fungal proteomes that will be used can be downloaded here.
Warning
Before following this tutorial, make sure that USEARCH is correctly setup on your system and reachable by TriFusion (see Setup of USEARCH).
Load proteomes
As already covered in a separate tutorial (see Load data into TriFusion), proteome files can be loaded in three different ways. Here, we’ll use the file browser to load 10 proteome files.
Navigate to Menu -> Open/View Data and click the Open file(s) button.
This will open the main file browser. Set the Input data type at the top
of the screen as Proteome. Then, go to the directory containing the
protome files, select them and click Load & go back.
If the files are correctly formatted
(see proteome format)
they should be successfully loaded and appear in the
Open/View Data sidepanel under the Files tab.
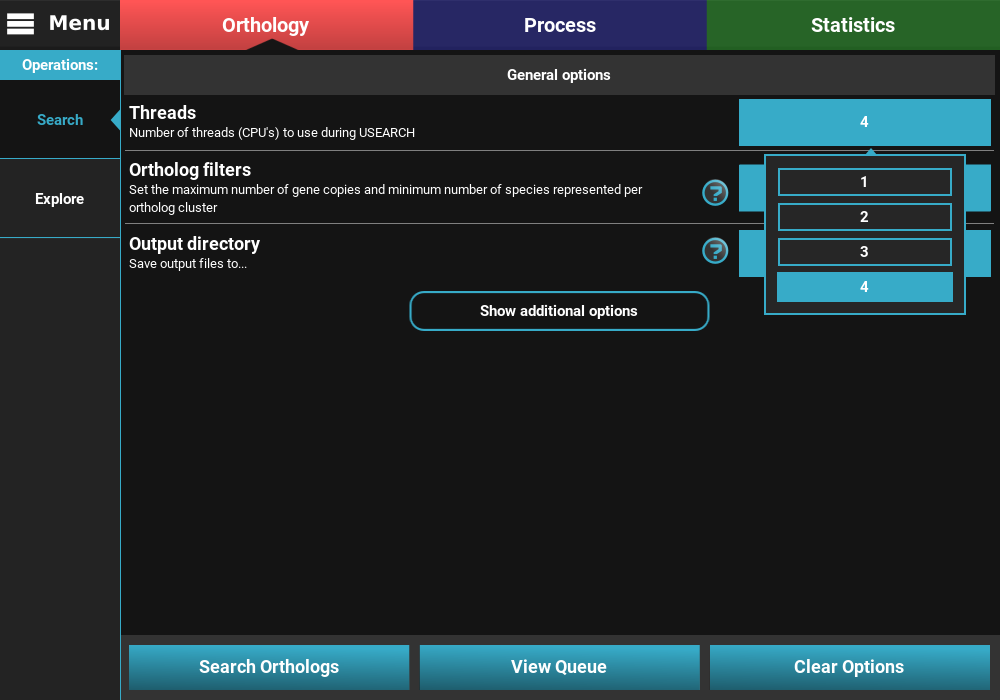
Orthology search options
Now let’s set the general options for the orthology search by navigating to
the Orthology screen. There are three general options:
Threads: Sets the maximum number of CPU’s that will be used by USEARCH during the most computationally intensive phase of the search. TriFusion automatically detects the number of CPU’s on your system and sets it as the maximum value available. In this example, I’ll choose 4 CPU’s, which is the maximum of my system.
Ortholog filters: Sets the filters that will be applied to the orthologs at the end of the search operation. Here you can set the maximum number of gene copies for each ortholog group, and the minimum number of species that must be contained in an ortholog group. Here, I’ll set a maximum number of gene copies of 1 (only single copy genes) and the minimum number of taxa to 5 (50%).
Note
These filters will not be permanent. They will be used to export the fasta sequence files at the end of the search operation, by they can can still be changed after the end in the Explore section. The final ortholog group files will contain all orthologs, regardless of the filters used here.

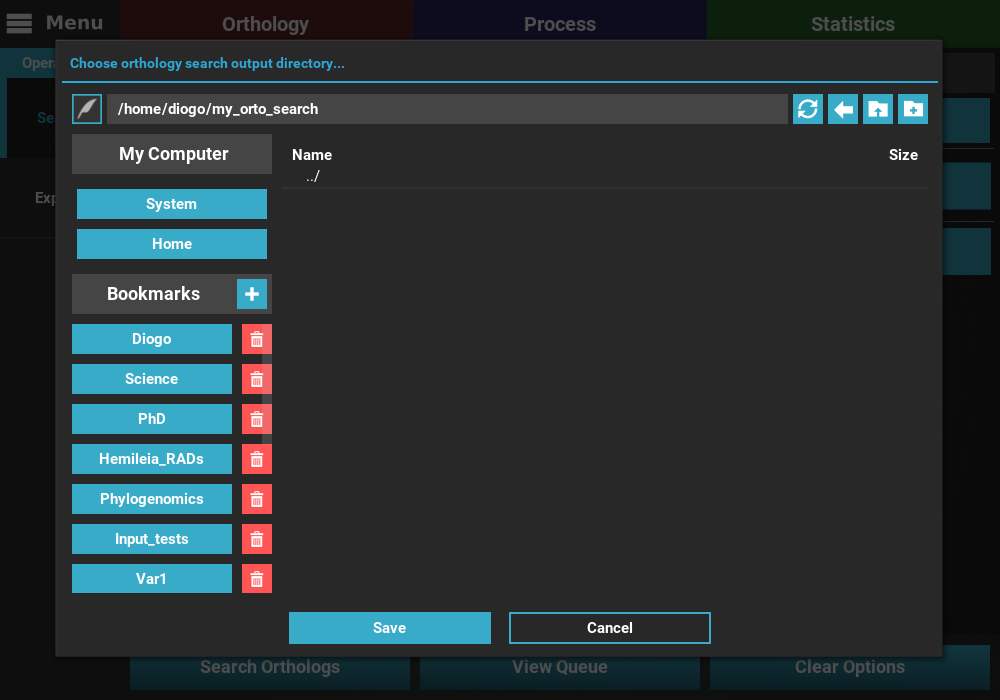
Output directory: Sets the directory where all output files (intermediary and final sequence files) will be generated. I’ll create a directory named my_orto_search on my home directory and set it.
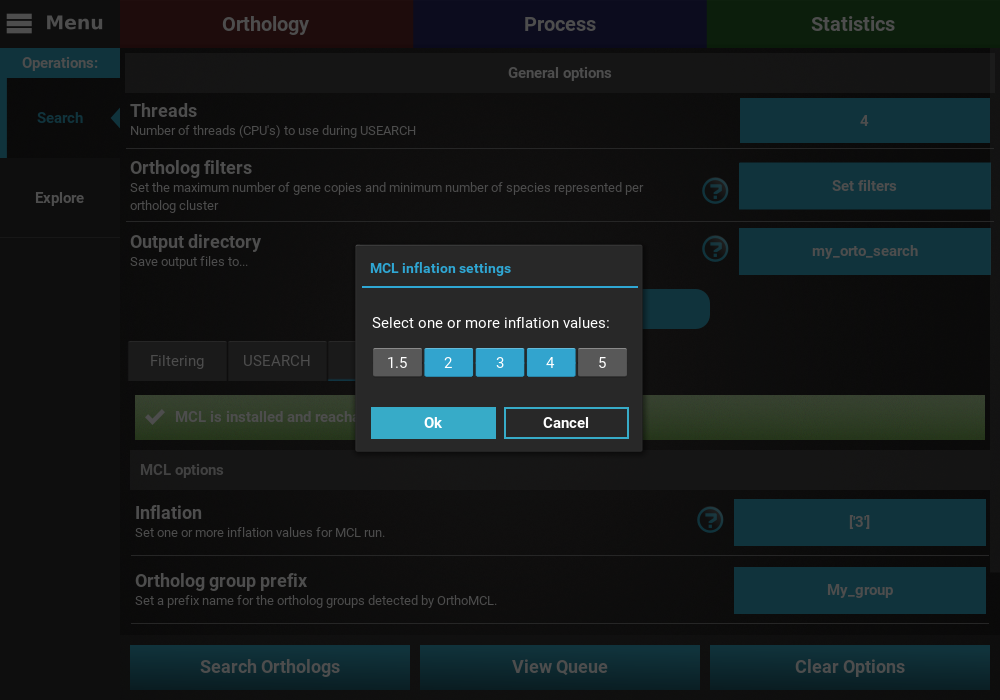
Setting these options would be sufficient to start our search operation.
However, I’m still interested in experimenting multiple inflation values
to see it’s impact on the final number of orthologs. To set multiple
inflation values, click on the Show additional options button, then click
on the MCL tab, and finally on the button of the Inflation option.
Here you can choose multiple pre-defined inflation values.
I’ll select three: 2, 3 and 4.
Start the search
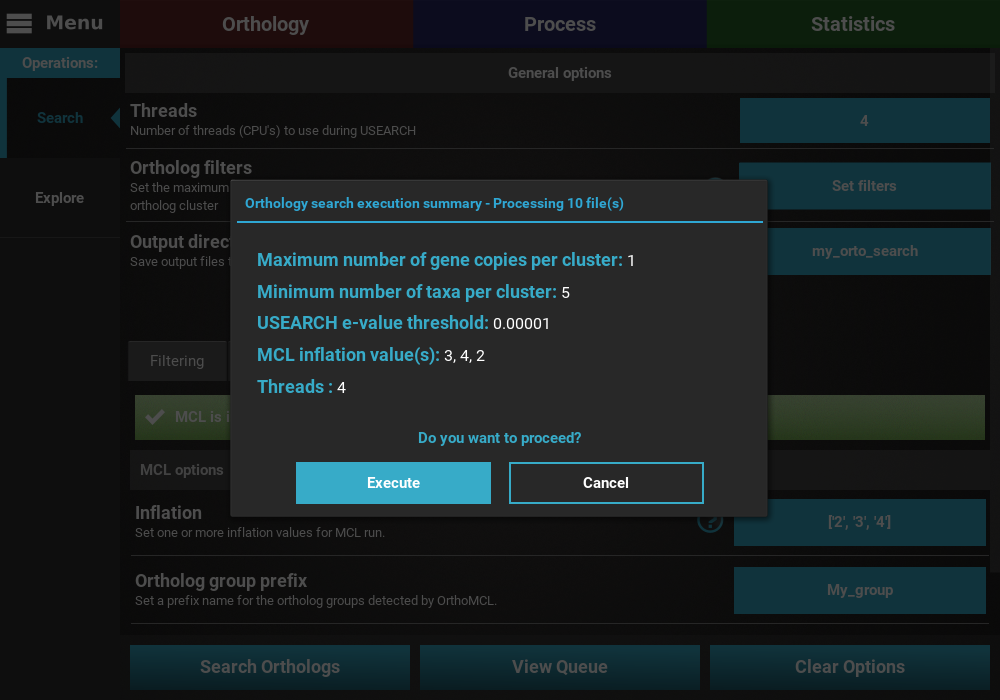
Now we’re all set to start our ortholog search. Click the Search Orthologs
button at the bottom of the screen to display the execution summary dialog.
Here you can see that 10 files will be processed, the values of the two
ortholog filters, the e-value threshold for the USEARCH operation, the
selected MCL inflation values and the number of CPU threads for the
USEARCH execution. Click on the Execute button to start the search.
Note
The execution of the search operation may take a considerable amount of
time, depending on the number of proteomes and their corresponding size.
In my system (Intel i5-3317U @ 1.70Ghz, 4Gb RAM, HD4000) the search of
the 10 proteome files took about 50 minutes. If you are only testing
and wish to obtain the results sooner, try to deselect some protome
files from the active data set in Menu -> Open/View Data.
The orthology search report
At the end of the search operation, a report dialog will appear with the search results for each inflation value.
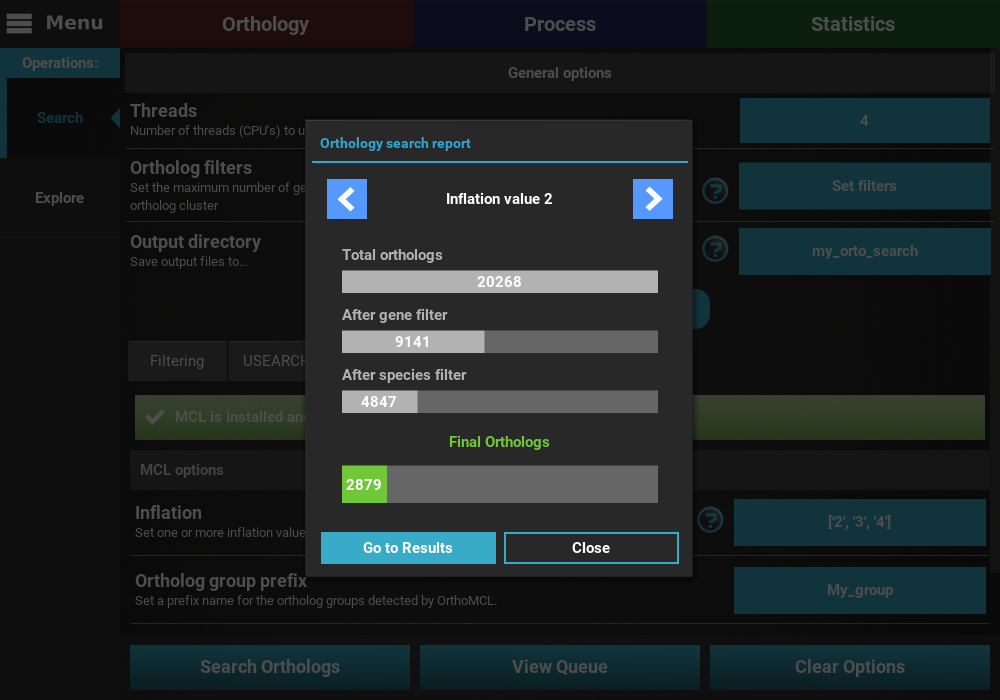
You can use the top arrow buttons to cycle through all selected inflation values. For each inflation value the number of total and filtered orthologs appear in graphical format. The orthologs that pass the maximum gene and minimum species filters appear individually, so that you can assess the impact of each filter. At the bottom, in green, the final number of orthologs that passed both filters is shown.
From this point, you can either further explore your newly detected orthologs
by clicking the Go to Results button, or close the dialog and proceed
on your own with the new result files.
Output directories and files
The results of the orthology search will be stored in the directory that you specified in the Output directory option. Inside, you will have two directories: a backstage_files, where the proteome database and all intermediate files were stored, and a Orthology_results, where the final output files were generated. Inside the Orthology_results directory, a groups file and a directory with the ortholog group Fasta files will be created for each inflation value specified before the search.
The ortholog group Fasta files already have the sequence name headers normalized for each taxa (or proteome). This means that the Fasta headers will be something like:
>TaxonA
MDG(...)
>TaxonB
MGF(...)
Instead of the original headers in the proteome files. However, if you wish to make the correspondence of particular sequence with their original names in the proteome files, a directory named header_correspondance is created with a list for each ortholog group.